Flashlight news result #IMALENT

How to Fix Low Voltage Display Issue on Imalent MS32 Flashlight?

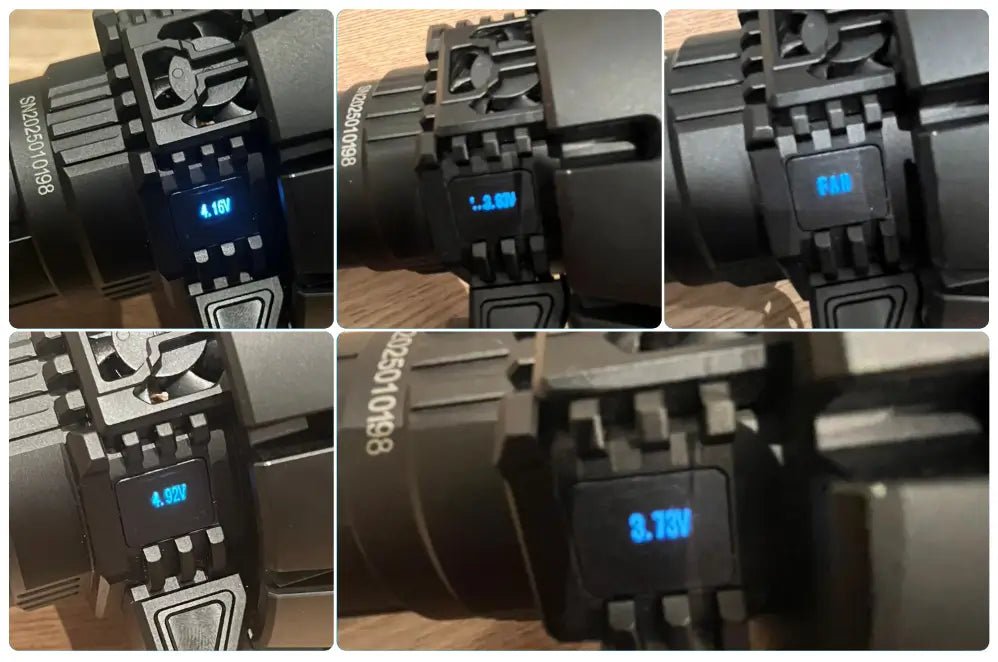
We recently received feedback from some customers about an issue with their Imalent MS32 flashlights. After normal charging, when reconnecting the battery pack to the flashlight head, the screen displays a low voltage warning, preventing the flashlight from turning on.

Our engineering team has investigated this matter and identified the likely causes and solutions.

What's Causing the Issue?

The problem typically occurs due to:

  1. Contact Surface Oxidation: Environmental factors like humidity can cause oxidation on the contact surfaces between the battery and flashlight, reducing conductivity.

  2. Spring Position Issues: The positive electrode spring may not properly reset due to various factors, leading to decreased current conduction.

Easy Fix You Can Do Yourself

Don't worry - this is a simple issue you can resolve in just a few minutes! Here's our step-by-step solution:

What you'll need:

  • A blade or similar thin tool

  • Your Imalent MS32 flashlight

Step-by-step instructions:

  1. Clean the contact surfaces: Gently use the blade to remove any oxidation from the metal contact points where the battery pack connects to the flashlight head.

  2. Reset the spring: Gently adjust the positive electrode spring with your finger to ensure it's in the proper position, allowing for optimal contact.

For visual guidance, watch our tutorial video:
MS32 Fix Demonstration Video

Proven Results

Customers who experienced this issue have successfully resolved it by following these simple steps. The fix restores proper conductivity and allows your MS32 to function at its full 200,000-lumen capacity again.

Preventive Tips

To minimize future occurrences:

  • Store your flashlight in a dry environment

  • Occasionally inspect and clean the contact surfaces

  • Ensure the spring returns to its proper position when reassembling

If you continue to experience issues after trying this solution, please don't hesitate to contact our customer support team at [your support email/contact page].

We're committed to ensuring you get the most out of your Imalent products!

@Frode Derksen --- Throughout the entire validation testing process, we greatly appreciate Frode Derksen's understanding, support, and feedback. Once again, thank you very much!

why the flashlight is not working - IMALENT®

Why the flashlight is not working?

You may experience difficulty turning on the LED flashlight. we will explore the potential reasons behind this issue and guide how to resolve it. Let's dig into the details.

Discover the IMALENT flashlight:

IMALENT flashlights are revered for their cutting-edge technology, superior craftsmanship, and impressive performance. These flashlights are designed to meet the needs of outdoor enthusiasts, law enforcement officers, and everyday users who need a reliable light source. They typically feature multiple brightness modes, long battery life, and rugged construction that withstand harsh conditions.

IMALENT SR32 flashlight

To solve the reason why the flashlight is not working:

  • low battery:

    The most common reason for a flashlight not turning on is low battery. Make sure the battery is inserted correctly and has sufficient charge. IMALENT's flashlight  rechargeable flashlight adheres to the concept of environmental protection. If the battery is low, please charge it in time.

  •  Battery contact problem:

    First, a bad battery contact will prevent the flashlight from being powered. Check the battery compartment for any debris, corrosion, or loose connections. Clean the contacts with a soft cloth or brush to ensure they are in good condition and properly aligned with the battery. Secondly, you can check whether the flashlight is tightened because the flashlight of IMALENT is to prevent children from accidentally opening it and hurting their eyes, so you need to tighten the flashlight to start it.

  • Mode selection:

    IMALENT flashlights usually have multiple output modes: high, medium, low, strobe, or SOS. Make sure you have selected the correct way for the desired brightness level. See the owner's manual for specific instructions on switching between modes. IMALENT has 4000 lumens essential chain flashlights LD70 to 120000 lumens world's brightest flashlight SR32; we can meet any flashlight needs.

    imalent ld70
    imalent SR32 flashlight
  •  Lock function:

    Some IMALENT flashlights have a lockout feature designed to prevent accidental activation. If your flashlight has this feature, check if it's enabled. The flashlight of IMALENT needs to be pressed four times to lock the flashlight, and to unlock it, press four times again. MS18 requires five presses to lock.

How to turn off the IMALENT flashlight:

Turning off your IMALENT flashlight is usually a simple process. In these order:

  • Identify the power button:

    Find the power button on the flashlight. It's usually on the side of the flashlight or the side of the handle.

  •  Lock the flashlight:

    Press 4 times to lock the IMALENT flashlight. If it is MS18, press the flashlight five times. After turning off the flashlight, you can unscrew the battery and the head of the flashlight to prevent the flashlight from being turned on accidentally.

  • Confirm shutdown:

    After releasing the power button, verify that the flashlight is no longer glowing. It's best to double-check to prevent any unnecessary battery drain.

In conclusion:

IMALENT flashlights are known for their superior performance and reliability.


If you cannot turn on your IMALENT flashlight, it is critical to resolving underlying issues such as the low battery, battery contact issues, mode selection, and lock function.


By following the troubleshooting steps outlined in this article, you can resolve these issues and enjoy the full functionality of your IMALENT flashlight.


Consult the user manual or contact IMALENT's customer support for specific instructions.IMALENT flashlight remains a dependable lighting companion for all your needs.

Night Trip With EDC Flashlights - IMALENT®

Night Trip To National Park With EDC Flashlights 

It's December 6th, and as winter sneaks into our tropical maritime climate city, the team at Imalent Flashlights, equipped with several EDC flashlights like the LD70 and R30C, as well as the MS18 and SR16, we decided to spend an evening creating content in our city's largest botanical garden before the weather became too cold to go outside. It was fun, the flashlights were truly incredible, and we even made some unexpected friends because of our shared passion for flashlights!


National Botanical Park After Dark

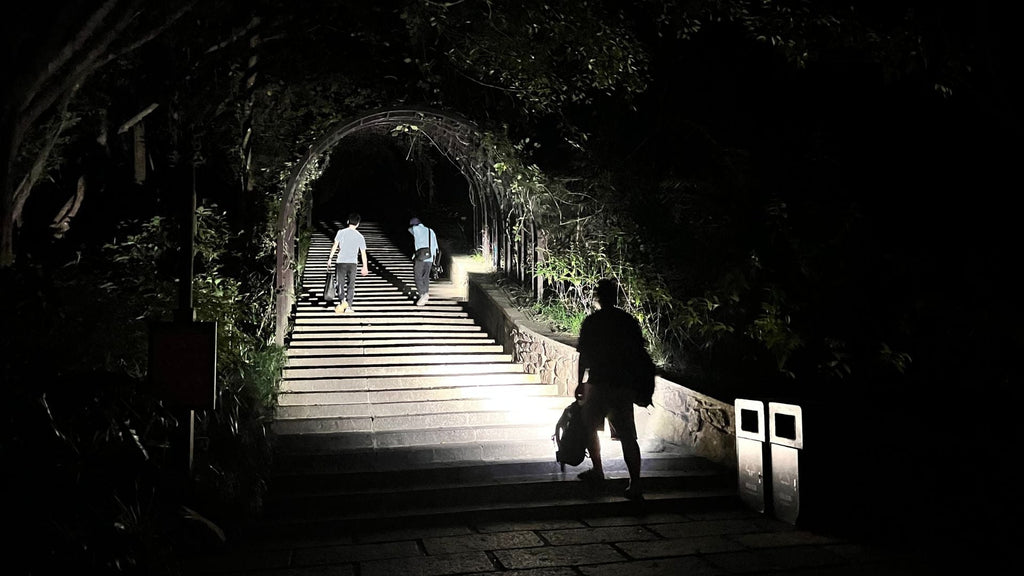
We entered the park after 6 pm, and the whole park soon gets dark when night arrives, carrying cameras and a bunch of flashlights, the flashlight we used for illumination while going to shooting ground is the R30C, it's a super bright EDC flashlight that's great with throw distance and some flood, weights only 216 grams, it's pretty handy and we used it at mid 2 level - 2,300 lumen. As you can see from the image, I walked behind the folks and provided illumination for us, while carrying a bunch of stuff... and that's why a compact LED flashlight is important, you never know how much stuff you'd be carrying when traveling with a group of people, a small LED flashlight is definitely more helpful and more friendly when you don't need to illuminate a large area.


imalent


Buddasim Temple In Completely Darkness


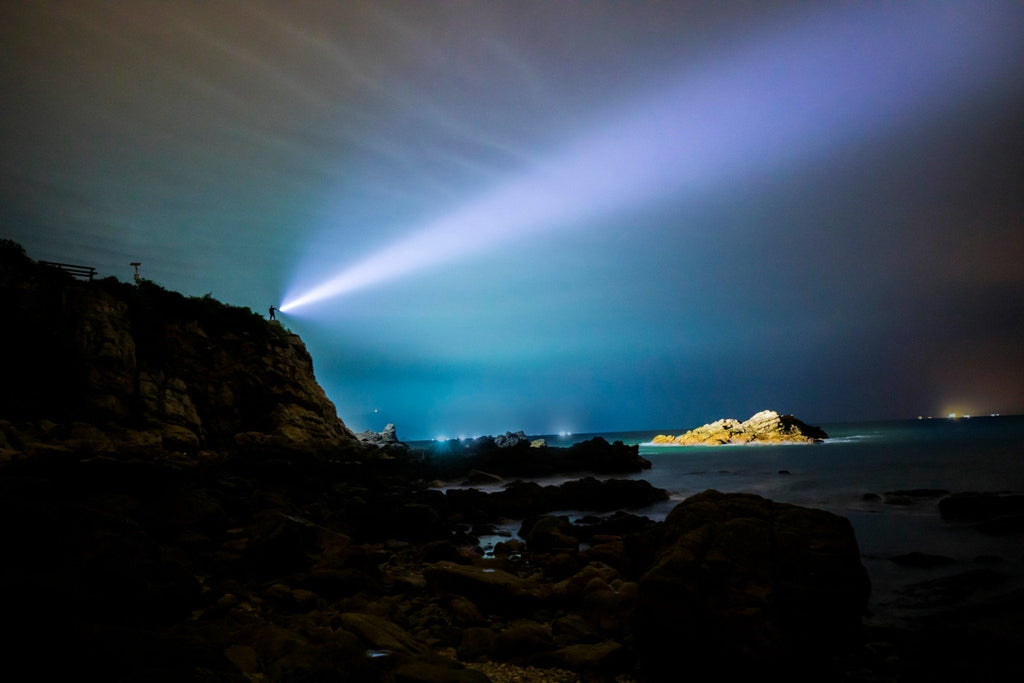
After climbing for 20 minutes, we reached a traditional Chinese temple that has 7 floors, it's located at the top of the mountain, and our surroundings were in pitch black... after we confirmed that there is no monks living in there, an MS18 is definitely worth of going for illuminating this big fellow. As you can see from the picture, MS18 the world's brightest flashlight brought the day back with 100,000-lumen output.


sr16 flashlight illuminate the tower


Lost in National Botanical Park


In order to find the huge flat grass court located in the center of national botanical park, we traveled around in the dark with a LD70 and a R30C, after several egoistic decision on finding our way with entirely our male instinct instead of maps, we found out the reality is that we are lost... Luckily, we brought the SR16 handle flashlight and it helped us to locate routes from a great distance, amazed by the power of SR16, our camera man Wu decides to take a picture of us using the SR16 flashlight, and got temperarily blinded for couple seconds... trust me, there are better angles to shoot an image for a flashlight. 

sr16 flashlight


Finally Arrived The Perfect Spot For Flashlights


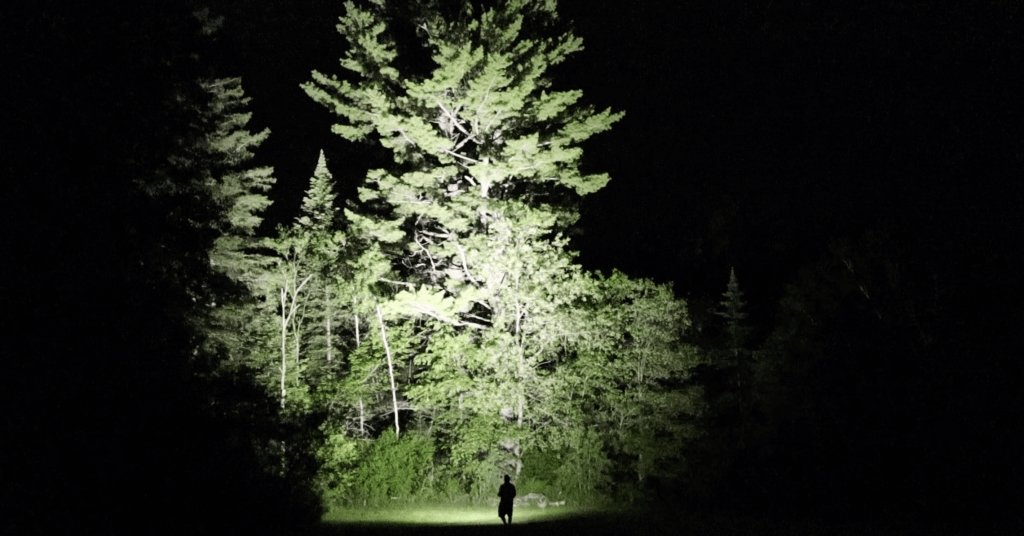
Our journey started with some EDC flashlights, and when we finally arrived the huge grass court in the center park,  a full display for the power of the world's brightest flashlight MS18 - 100,000 should take place, it's always so much fun to illuminate such a large area with a portable flashlight, its shocking brightness and the amount of reach it has are just incredible, until our disturbution of the night arrival attracted some special friends.

ms18 illuminate the whole grass court


Imalent MS18 (feat. Park Security) 


Apparently when you working as a park security personel, most likely you have a flashlight of your own, and your 2,000-lumen flashlight might seem a little boring comparing to a 100,000-lumen flashlight... Security arrived in their mini eletrical vihicle, and asked about our intention, after knowing we are just filming for this flashlight, he wanted to try it out himself, and we laughed about the incredible amount of light it produces. 

security try out the MS18 flashlight


By the time we finished shooting videos, it's almost 10pm already, and we were asked to leave before the park closes down. 

While heading home, we talked about these flashlights and discussed about the applications of these flashlights we brought today, and the result is while flashlights like LD70 and R30C are great for travel at night for extended time of use, flashlights like SR16 and MS18 are more capable when it comes to large area illumination, and they certainly are more practical when situations get tough and you need a powerful flashlight with strobe to protect you. 


IMALENT flashlight photo album collection is in need! - IMALENT®
Hi here all the IMALENT fan!
We are here to announce a campaign that can help you to win a 30% discount coupon that can apply in all model of our product!
All you need to do is to send us the photo of how you use our product on your every daily life scenario,Once you photo was selected,The prize will come along right the way!
Campaign starts from: Jan 2022
imalent ms03
how to repair flashlight batteries - IMALENT®

How to repair flashlight batteries


With the long-term use of flashlights, we have more and more garbage batteries on hand. Because of the large internal resistance, we can't use them. If we throw away the batteries, it will damage the environment. Many batteries are easy to use at the beginning. After charging for dozens of times, they gradually become more and more difficult to use. Finally, they are idle in the warehouse.

flshlight battery repair

The principle of repairing batteries

I have tried small current charging, large current impact short circuit and other methods are not successful. Later, in several forums, I saw that someone poured water to repair the battery. The principle was very simple: when the Ni MH battery was charged, the battery would heat up, and the electrolyte would evaporate into gas and escape from the pressure relief hole. After a long time, the electrolyte dried up, resulting in the increase of internal resistance and scrapping of the battery. 


In particular, high current charging and even serious overcharging of the flashlight battery led to the faster drying of the electrolyte, while the electrolyte dried up, and the electrolyte was basically still in use In the battery, just add water to make the battery recover. There are many ways: drilling holes in the bottom of the battery, drilling holes in the top of the positive cap of the battery, and even steaming the battery in a pressure cooker, freezing it in the refrigerator, boiling it in water, pumping it in a mineral water bottle, and so on. For the method of hard damage to the battery structure such as drilling holes and drilling roof, many people use solder repair welding, the actual effect is not good, and many people can not master those difficult technologies, and damage the battery will affect the appearance, and the leakage will damage the electrical appliances in the future. It's very difficult to see the amount of water added by other methods of adding water. I don't know how much water is added. It's less important and more likely to leak. And there are some ways to make people afraid and uneasy. Is there a better and simpler way? I carefully learned from many experts' schemes, and I made some improvements in combination with the actual situation. I feel it's not bad. If you feel it's feasible, you can refer to it.

flshlight battery repair

Let's take a look at my batteries first. There are more than ten Pinsheng batteries (all of them are 16 years old), two Shanzhai Samsung batteries (15 years old), three GP superba batteries (around 2010 or even before), and one BTY battery (actually, there are four batteries. The remaining three batteries were found a few days ago, and one has not been repaired. It's rubbish!) In 2013.


Let's talk about the results first: the success rate of more than 20 batteries is more than 90%, and 3 batteries are not repaired successfully. The only ones that can't be repaired are BTY's so-called garbage battery, one GP super bully, and one Pinsheng, which I used to do experiments. GP super Ba, which has been released for more than ten years, has three sections in total. Except for the one that hasn't been repaired, the short-circuit current of the remaining two sections has reached 3-4A after repair. I used a 35 yuan Shengli 830l digital meter to measure it. It's still not easy to install it in the camera, but it's already very good in the razor. All the remaining Pinsheng batteries, including two Shanzhai Samsung batteries, have been repaired. After they are fully charged, the use effect can be close to that of the new batteries, and the short-circuit current is mostly 5-6A. 


In the self discharge test, half a month after the battery is fully charged, 1 / 3 of the batteries are almost dead, 1 / 3 of the batteries are still full, and 1 / 3 of the batteries are low. Even if the battery is not fully charged on the day or the next day to use basically no effect, it should be said that the result is very satisfactory. I use the smart 936d charger to connect to the computer to see the discharge curve is not bad (not for smart advertising, I buy it is to see it can be online only). Although it's a little less than its 2300mah mark, even the new battery Pinsheng will be falsely marked, and there's not much less. Moreover, almost all Pinsheng in my hand use Jinpeng and haopeng batteries (ordinary Pinsheng is marked with letters and numbers beginning with JP, which should be manufactured by Jinpeng, while Teyi is marked with letters and numbers beginning with HP, which should be manufactured by haopeng), It seems that the battery cells of both of them are not so good.

Next: how to repair the flashlight betteries

Because the battery brand is different, the pressure relief hole structure is also different, Sanyo's battery pressure relief hole is very large, you can add water without drilling, repair is the most convenient! It's a pity that I only have 2 sections in my hand. I don't use it many times. It's still good. I don't need water. The others are difficult. They must be drilled with an electric drill. Some people use nails to drive them. I don't recommend it. The damage is too severe. Use the electric drill to drill the pressure relief hole larger, which will not affect the sealing. It is similar to Sanyo's pressure relief hole. This is the best way. The following is the type and structure diagram of several battery pressure relief holes for reference. After reading, I also have a specific feeling about the depth direction of the big needle. The green leather bag in my hand actually saw that there was no pressure relief hole, which made me marvel! I don't know how to design its pressure relief hole. If there is no pressure relief hole, how can the electrolyte dry up, and if there is no pressure relief hole, the charging and heating pressure will explode, which is abnormal.

Processing to recover flashlight batteries

 let's introduce the process, The Tools that i use:

  • surgical blade

  • small electric drill

  • medical pure water

  • syringe needle tube

  •  two pins

how to repaire battery

I don't spend money, and you can also basically spend no money:

A bottle of 500 ml medical pure water is only a few yuan. You can ask the nurse of the hospital for a waste needle tube, and then ask her to pump a tube of pure water for you;

You can also find aluminum alloy decoration without an electric drill The shop asks the man to drill for you. At most, it's just a good cigarette.;

First of all, cut the neck of the battery close to the positive electrode with a sharp knife, and remove the insulating sheet and the outer skin. (I had no experience at the beginning, so I used the method of peeling off all the batteries, and then came up with this move). 


Then, use an electric drill to drill a pressure relief hole at the positive electrode of the battery (Sanyo's does not need a drill, its pressure relief hole is relatively large and high). The electric drill just started to drill more holes than before It's troublesome. The battery cap is round and easy to slide. After you drill two holes, you can get hold of it. Expose the rubber valve inside. Clean the positive electrode with cotton swab and pure water. Use a pin (if it's difficult to absorb water at the back, you can use two pins to increase the gap of the pressure relief valve) to insert 3-5mm along the bottom to the center. Use a syringe to drop pure water into the positive electrode ring for 0.6-0.8ml (this amount is my test) It's only after several tests. Don't add more! More will leak! The effect of adding less is not good), and then put the battery into a water cup filled with hot water to heat for about 1 minute (I didn't experience it at first. I burned the bottom of the battery with a lighter to burn the battery skin out). You will find a lot of bubbles coming out. When there are no bubbles, take out the battery immediately, and then put it into another water cup filled with cold water (it's better to add some ice). At this time, the water will slow down Inhale into the battery (some batteries even suck up the water instantly!) Then put the battery cover and insulating sheet back to the original place, and glue it to the same place. If the condition is good, you can use transparent heat shrinkable cover to seal it better. If the cover is broken, you can also use colored heat shrinkable cover to seal it directly.

Finally, I put on a few more good photos. There are the shrink skin I bought, transparent. And inadvertently obtained battery skin, after the package is almost new battery! But one of the two German batteries I tried to pack is the test product. It is a little bit more water added and the liquid leaks. You can see that the positive pole is a bit wet. But now that all is done, I'm not ready to take any more photos. The battery skin is silver, and the flash reflects the color of the flash when taking photos.

My DIY battery

repair flashlight battery

Add a few extra words

Please use up the battery before adding water, otherwise the pin will be short circuited, which may cause scalding, and electrolysis will occur after adding water, which will affect the effect of adding water. Secondly, do not charge the battery immediately after adding water. Put the battery upright for a few hours and then charge it with a small current. After discharging, recharge it again. The best effect can be achieved by cycling about 3 times. I used it after adding water in July. It's been 4 months now, and I haven't found any problems. It can be seen that adding water is not useless at all as some guys say, unless the water is added incorrectly (actually not added), or the added water has too many impurities, resulting in serious self discharge, which is not as troublesome as some guys say. I think it's extremely simple. Now I can add water to a battery in less than 5 minutes, if Sanyo estimates that it won't take more than 3 minutes. In addition, the best charger is high precision, can automatically stop the full, otherwise still continue to charge after full, it is easy to charge bad in the future. The charging current of the charger is a little lower, and the battery with low heat is not easy to damage the battery. I didn't find that the online saying that the greater the charging current, the greater the discharge current is correct. I charged with 1A current, and the discharge current is almost the same as that after 100mA charging. 


I hope it is the individual difference of my battery brand. Some people use drinking water and even tap water, which may be no problem, but I still recommend pure water. I recommend medical water for injection. The water that can be used for people is much cleaner than the water you drink!

Newsletter signup

Never Miss a Style Story

Get the latest fashion tips, trend reports, and exclusive blog content straight to your inbox.